LOGIN FOR MEETINGS & TO COMMENT
Email Address1:
Password:
Forgot Password
Register Now

Bookmark and Share


Tweet
FORMS

TEL, e-Mail & URL LINKS

MEETINGS

Blogs & How To Tutorials

SCROLL BOXES

FLIPBOOKS & eBOOKS

IMAGE & VIDEO GALLERIES

DOWNLOADS

How to tips Return to the Topic Summary Page

Content Presentation: Adding an Image Rotator to a Linked Webpage,etc.

Display  None   Instagram   Facebook   Twitter 

Image Rotators

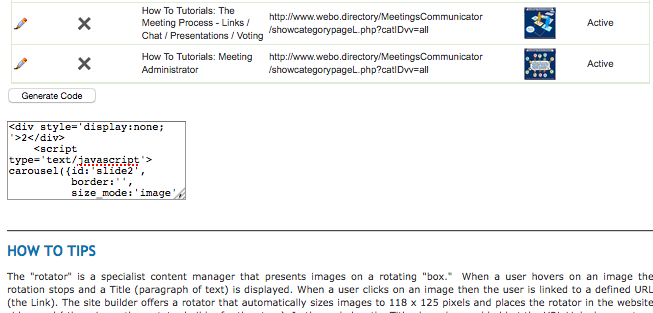
Adding a rotator to any page with a Page Editor such as to a Linked Webpage with a Ckeditor is easy and fast to do. You upload images to the page loader and the system does the rest. Should you wish to customise the size of the rotator this can be done by editing the code. Editing the code is not difficult and it is covered below.
 
A rotator automatically displays in the side panel of the website or services showcase/store. The images are automatically resized to fit in the side panel.
 
By copying and pasting the code into the Source View of a CKeditor you can place a rotator on any page builder. There is no limit to the number of pages that can be loaded. Practically, too many pages will affect the page opening time and this will have to be assessed as it will depend upon page size and file size.
 
Rotators can display photos or .jpg word or powerpoint pages, etc. the defauft size is 118 pixels wide and 125 pixels high. The side panel size allows it to spin on a moving axis that fits the side panel which is 180 pixels wide. In general one should allow about a quarter of the width of the image as free space in the display panel to allow for the yaw (horizontal axis movement).
 
The rotator is built by you browsing and loading images that are automatically loaded and resized after you have selected them for loading.
 
Resizing images to the display size intended will make your page load faster and not distort images that are loaded.
 
Where you intend to load a rotator to a page such as a Linked Webpage then all you need do is copy and paste the code into the Source View of any page with a CKeditor.
To customise the rotator to suit your needs you can, in the source view, edit the code. the default is width: 118, height: 125, sides: 3 and speed: 5  As you add sides the rotator will move from a rotating “box” to a rotating “cylinder.” Rotator Images can be labeled with a sentence of text and each image can be hyperlinked to a destination URL.
To build a Rotator select the option in the Admin Panel (see right hand side image). When the page opens read the HOW TO TIPS. Next, load images at the size that you wish to display them at. The bottom of the schedule of loaded images is seen below. To create the rotator above you need to copy the code from the code generator (see below) and paste it into the SOURCE view ( see Source Above in the top left hand corner of the page Editor's options). Select Source and view the code re  the images that were loaded into the Rotator. A portion of the code will read as follows: > width:118, height:125, sides:3, steps:23, speed:5, direction:'left',  >  This code was changed to read: width: 600, height: 480 and this allowed about 10% for the horizontal yaw (see above).
Please note that the rotator will also show in the side panel of this site (see the home page) and if this is not desired then the rotator must be deleted or you can deactivate the images.
 
If you hover on an image the rotation will stop.
 
If you click on an image then a hyperlink will be activated to take you to a specified URL. In this case the images link to the Blog Category and Topic Summary page.
 
You can load images of any width and height. You can load newsletters, Project Reports, Financial Statements and more.
 
Attachments : 
No Attachments
Average Star Rating Click here to add a comment
Email this pageBookmark this pagePrint this Page Login
Find Us on FacebookAbout & How to Set Up Online Meeting RoomsFind Us On YouTubeFind Webo Digital on FacebookRead more about our Directories & Site BuildersRead More About Reputation & Referral Marketing: Download a PDF